Field Setup
Fields
Fields are used to collect and hold details about your assets. Your Fields are unique to your organisation and customizable. Gather information important to you:
- Report construction type, occupancy numbers and fire safety equipment.
- Attach photos, floorplans and QR codes.
Setup
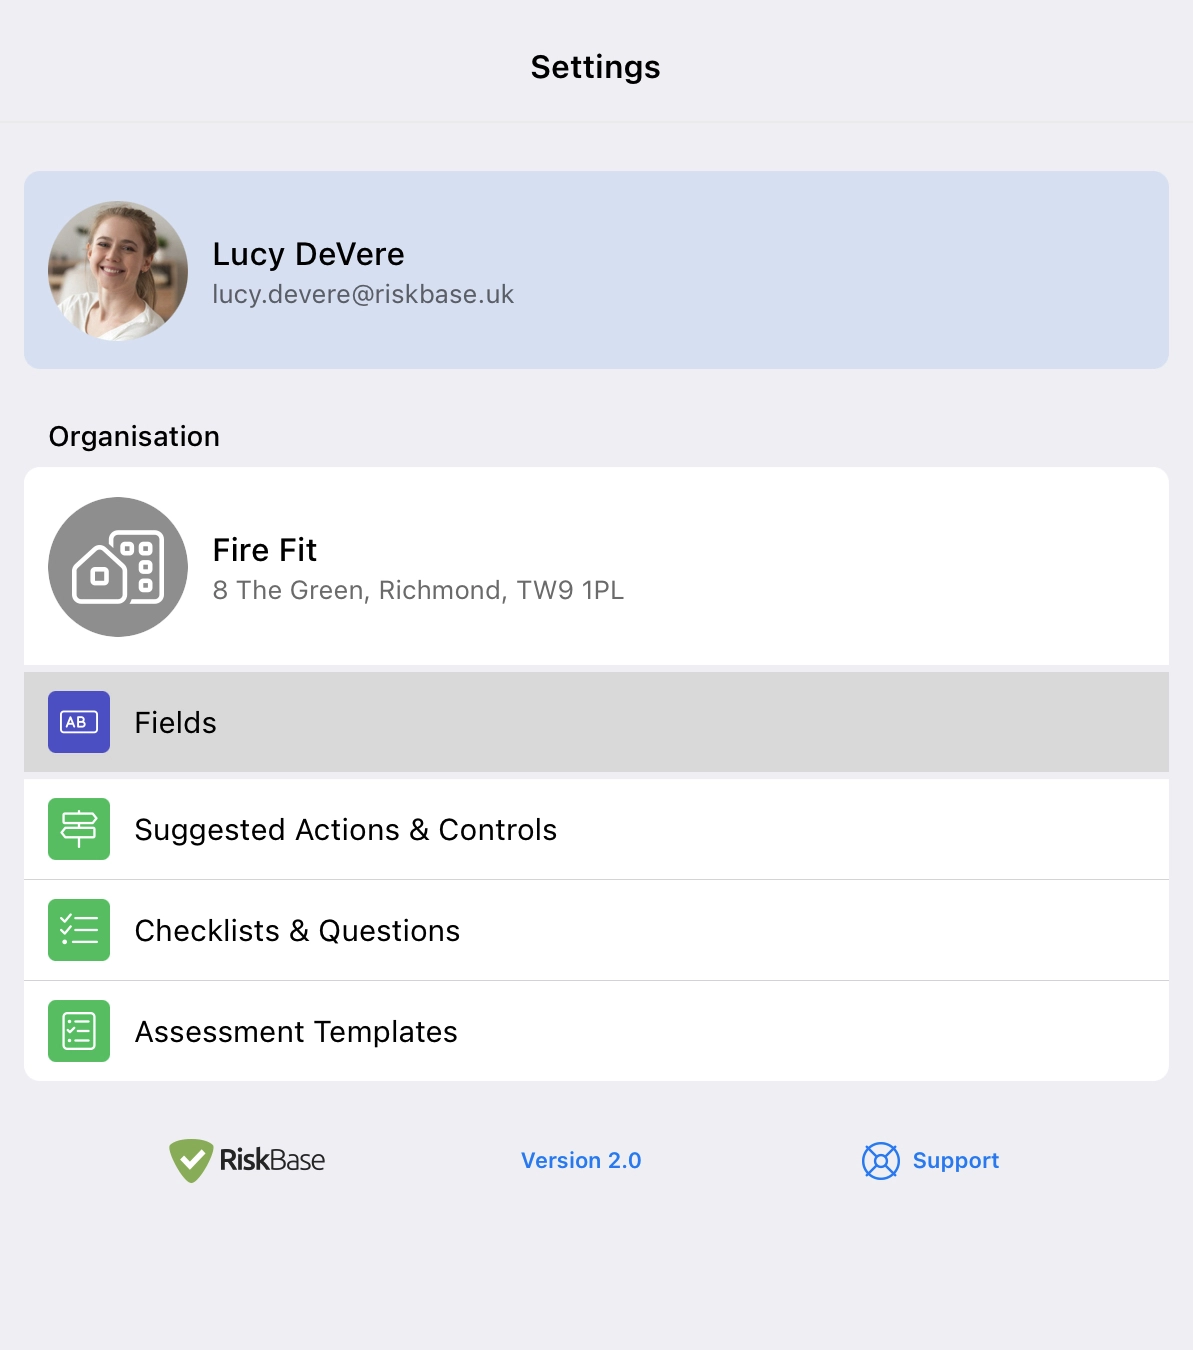
Get to Field Setup on the App
- Press on the Settings tab - bottom, right.
- If you have access to multiple organisations, switch to the organisation you wish to work on.
- Press Fields and your organisation's Fields appear on the right.
Permission is required to modify Fields.
Contact your RiskBase administrator or email support@riskbase.uk to request access to Field Setup.
Field Types
Fields come in all shapes and sizes and are designed for different purposes.
Use the field type most suited to the type of data you want to capture.
- Text Short or long text based input.
- Single Select List A pre-determined set of drop-down options where one answer can be selected.
- Multi Select List A pre-determined set of options where multiple answers can be selected.
- Number Only accept inputs in number format.
- File Upload and link files; PDFs, spreadsheets, etc.
- Image Upload photos from your photo library or devices camera.
- Date Only accept inputs in date format.
- Time Only accept inputs in time format.
- Pin Drop pins on floor plans to identify the locations of building elements.
- QR Asset tag your building elements with QR codes.
- Divider Creates a page break with a title.
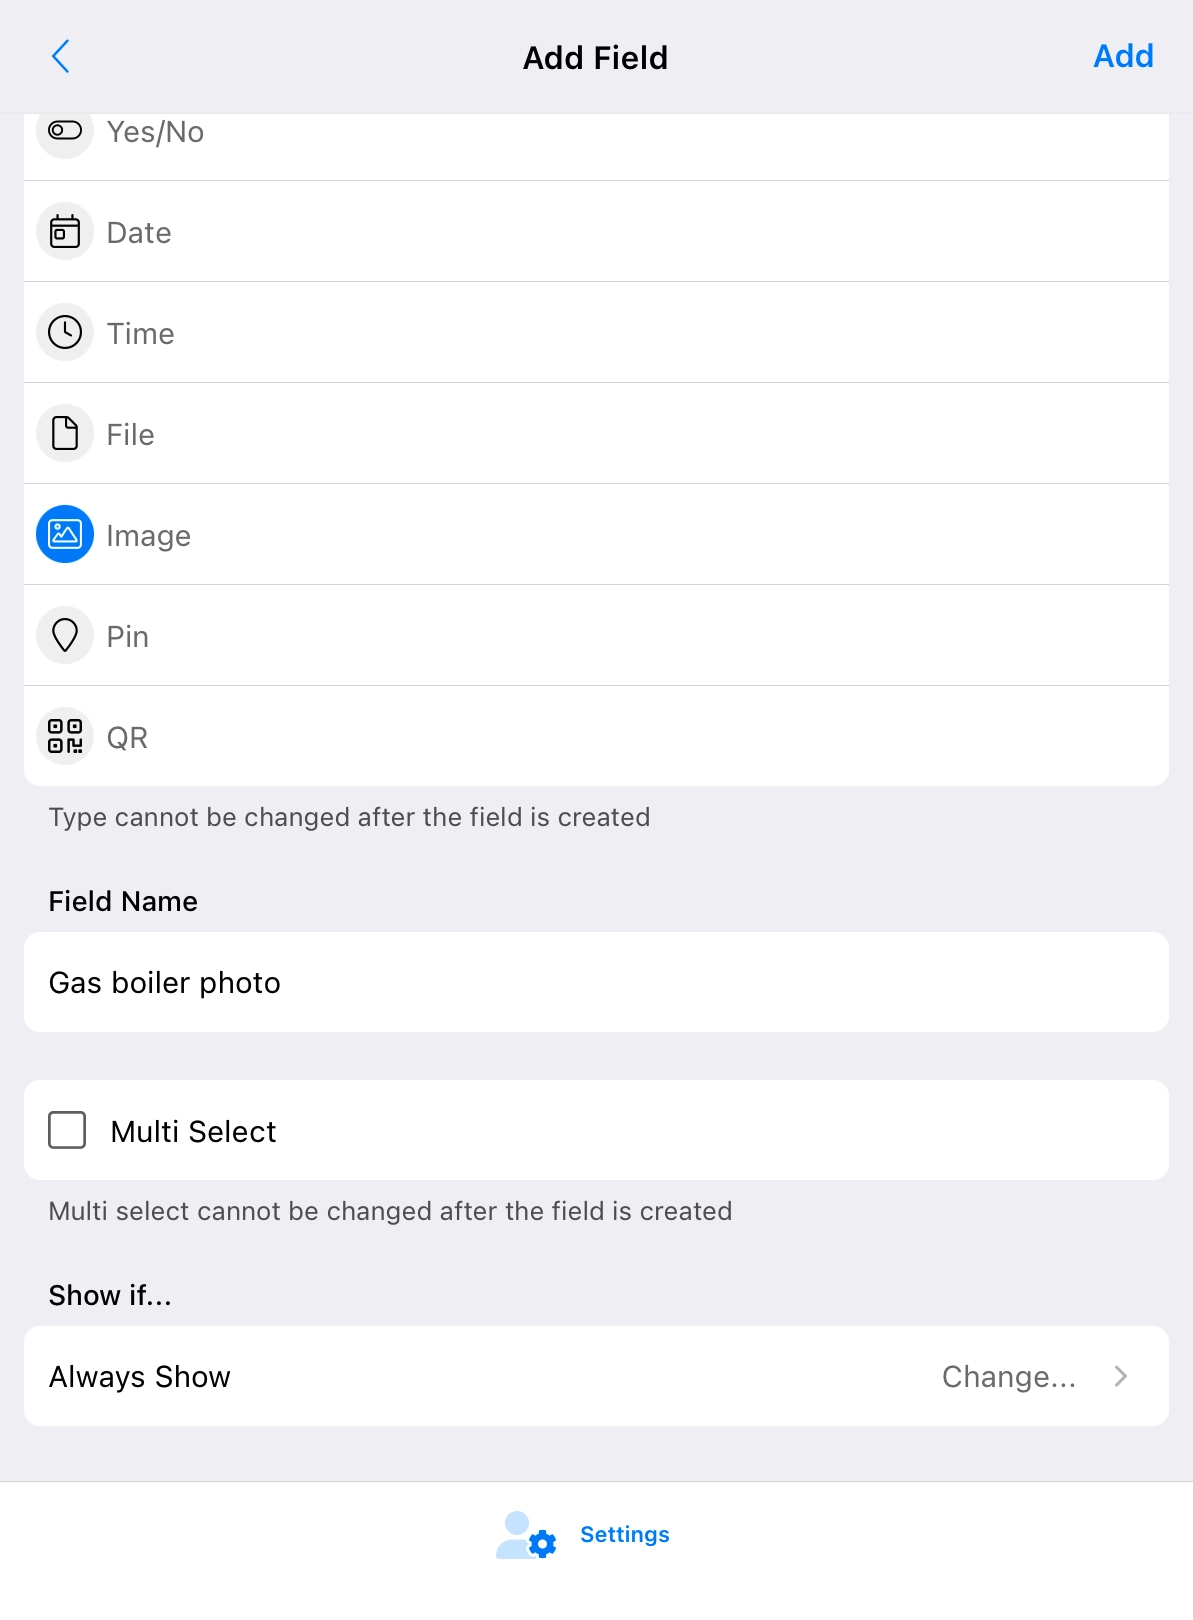
Create New Field
- Press on the field section you want the field to appear in.
- Press on the field group you want the field to appear in.
- Scroll to the bottom of the existing fields, press
 Add field....
 - Select the field type.
- Provide a Field Name.
- Use the Show if... function Optional.
Show if...
Fields can be set up to only appear based on the response to other fields, e.g.
Fire Suppression
- No - no other fields are shown.
- Yes - additional fields Alarm description and Alarm Panel location appear.
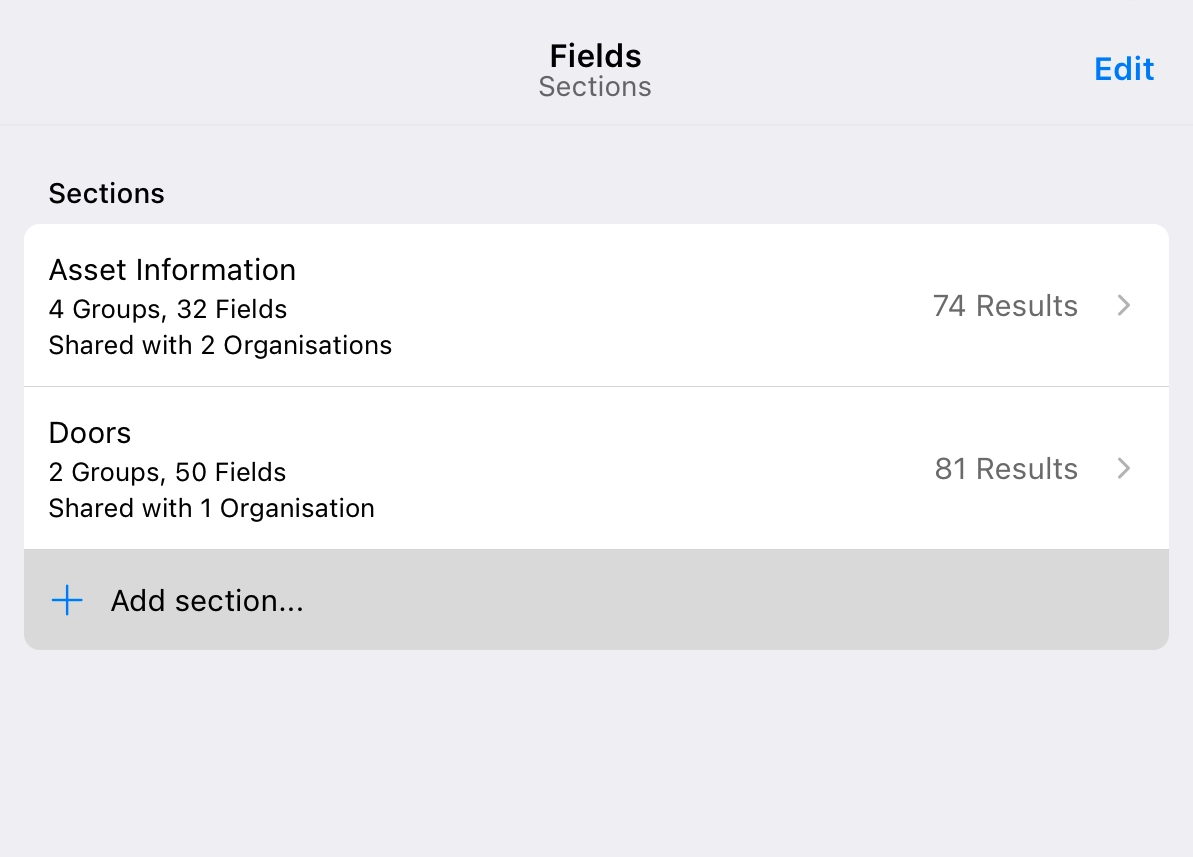
Sections
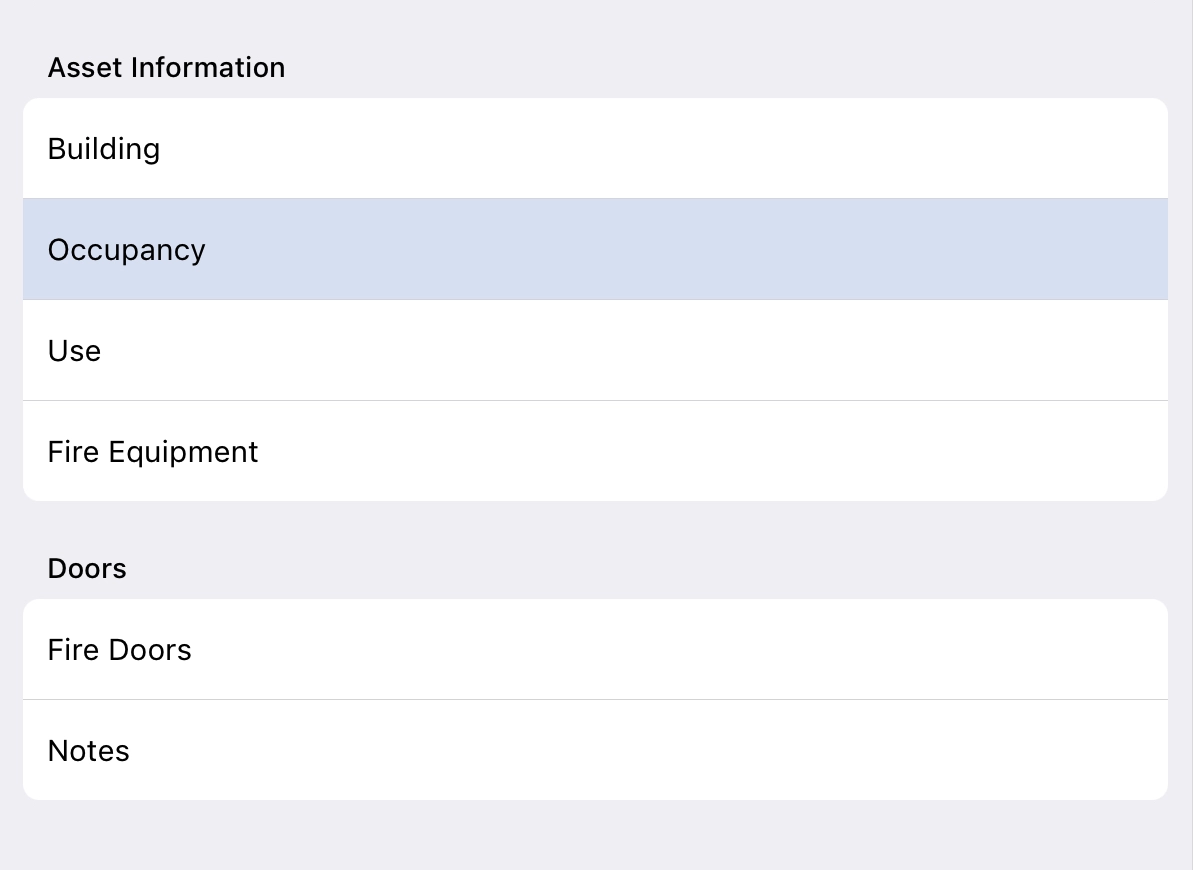
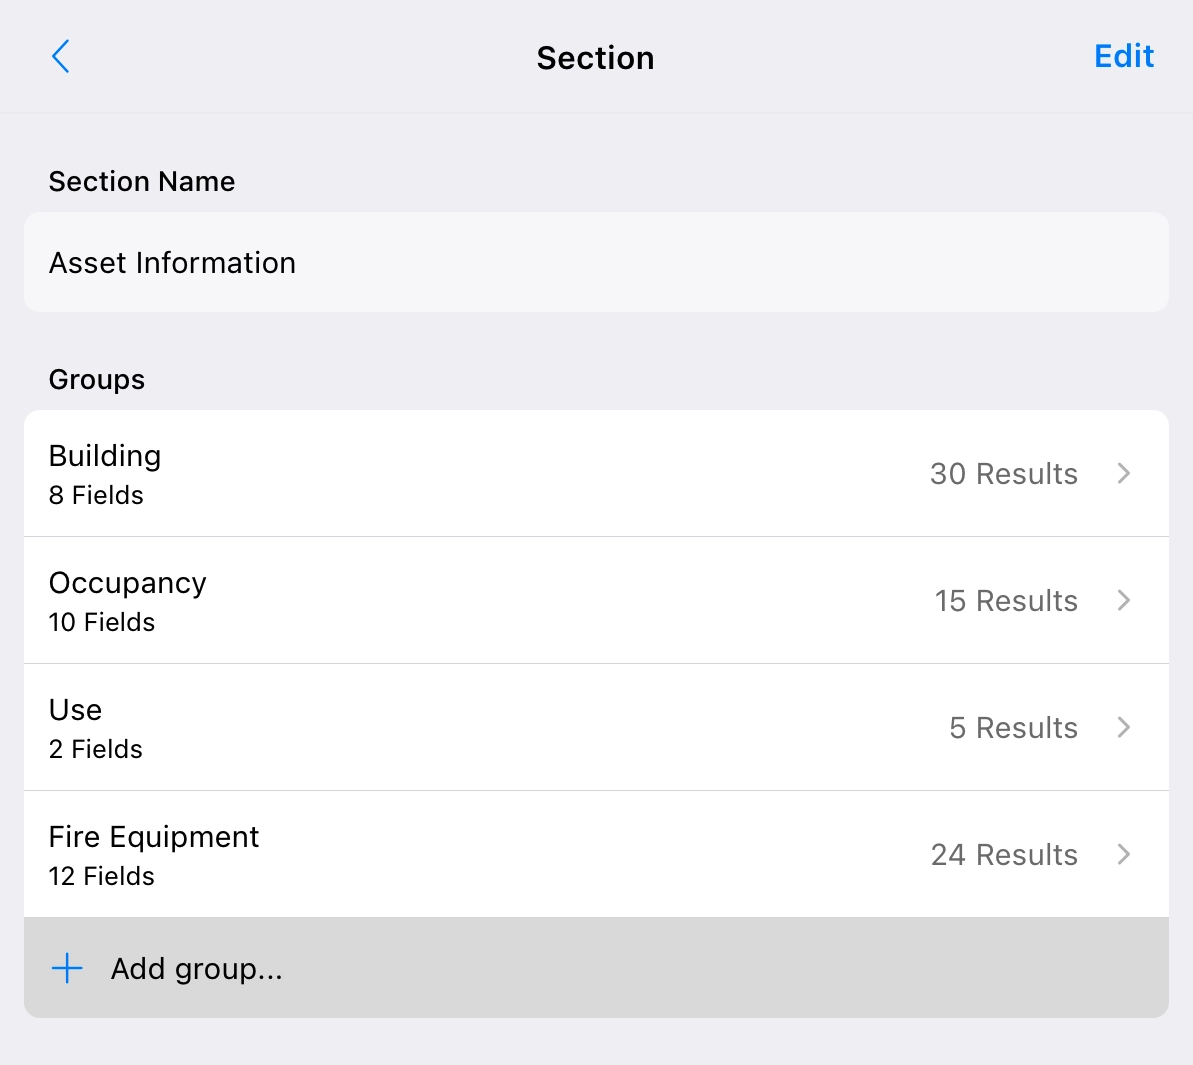
Organise the different types of information into sections. Information appears in these sections on the app and on reports.
In the example below, Asset Information holds details about the Building, Occupancy, Use and Fire Equipment. There is a seperate section for Doors which holds the specification and conditional information of each Fire Door at a property.
Sections are unique to your organisation. Structure field sections however you want.
Create a New Section
- Press + Add section....
- Give the section a name.
- Press Add.
Groups
Further organise fields into groups. Inside the section Asset Information is Building, Occupancy, Use and Fire Equipment.
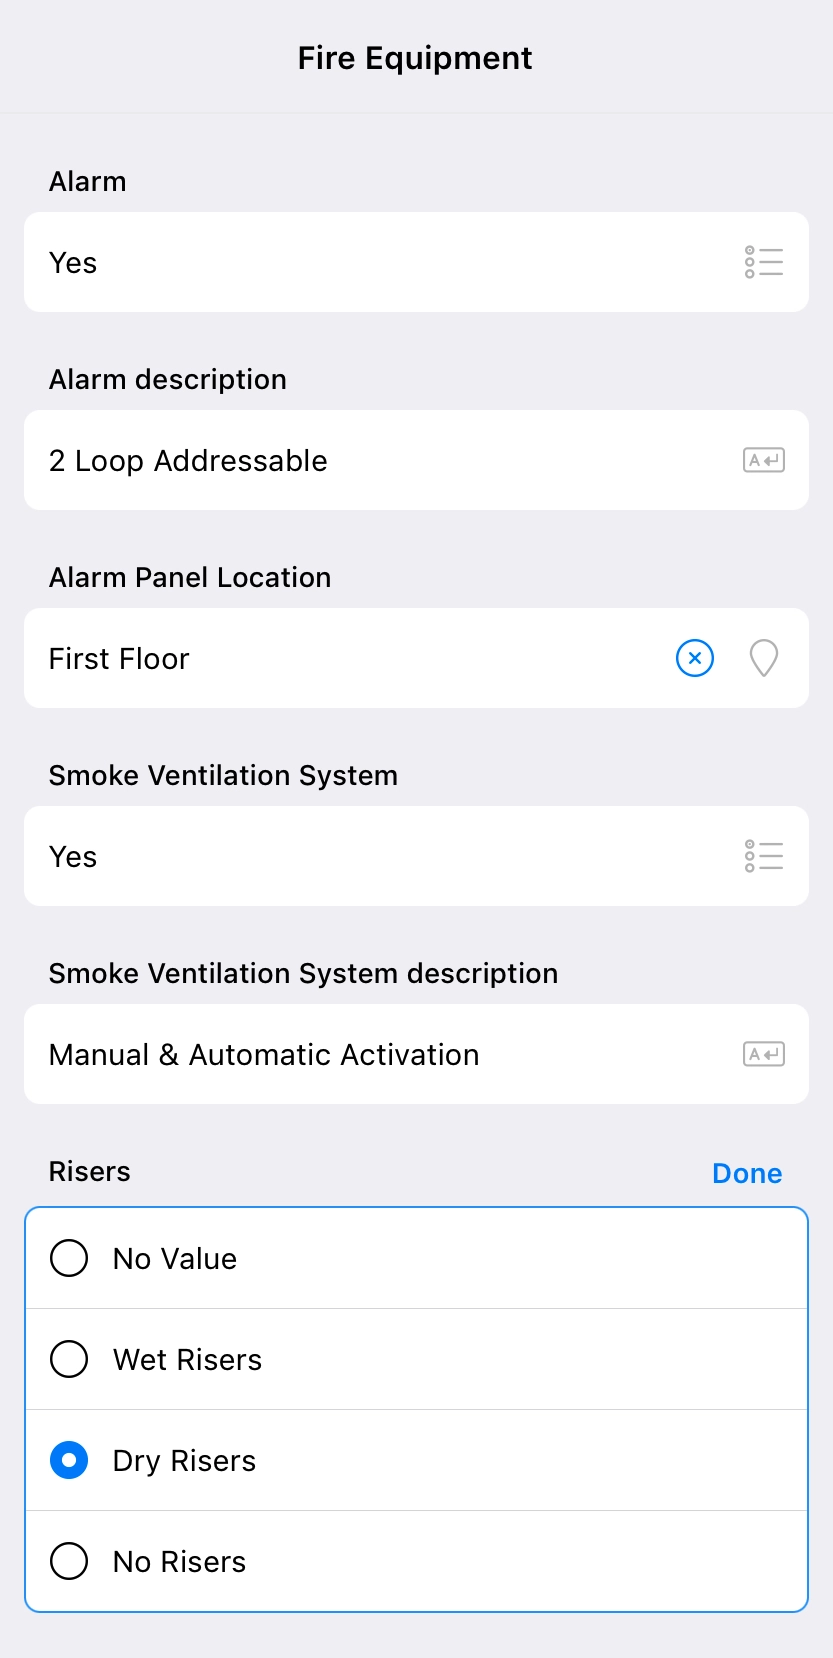
The Fire Equipment group could contain fields:
- Alarm Yes/No field.
- Alarm Panel Location Pin field to attach floorplans and drop pins.
- Alarm Panel description Text Area field to describe the system.
- Smoke Ventilation System Yes/No field.
- Smoke Ventilation System description Text Area to describe the system.
- Risers Options field, multiple choice dropdown.
Groups are unique to your organisation. Structure field groups however you want.
Create a New Group
- Press + Add group....
- Give the group a name.
- Press Add
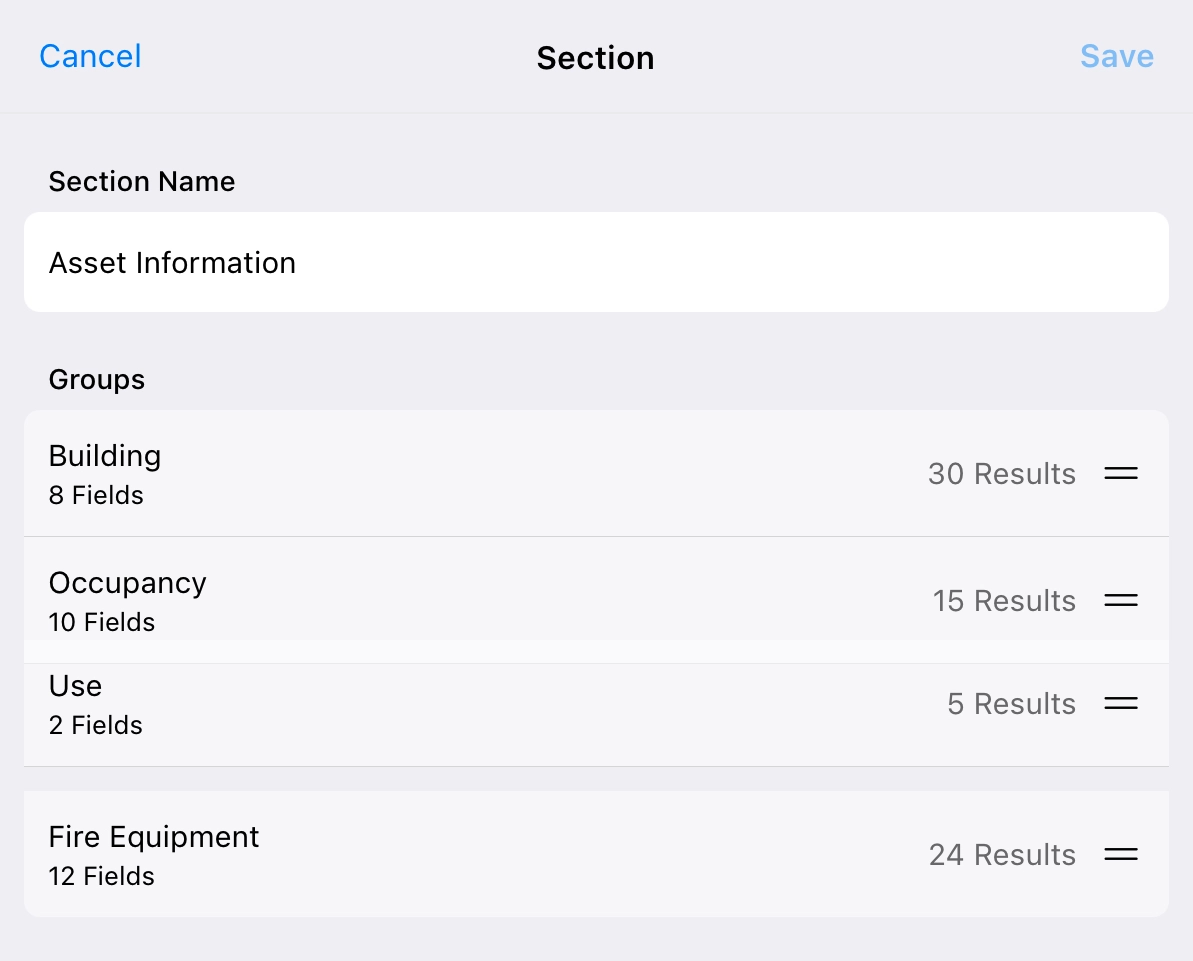
Re-order the Groups in a Section
- Press Edit - top, right.
- Drag the groups up and down using the right hand
 icons.
 - Press Save.
Repeatable Fields
When you need to record and store data on multiples of the same item as in a Fire Door survey, use Repeatable Fields.
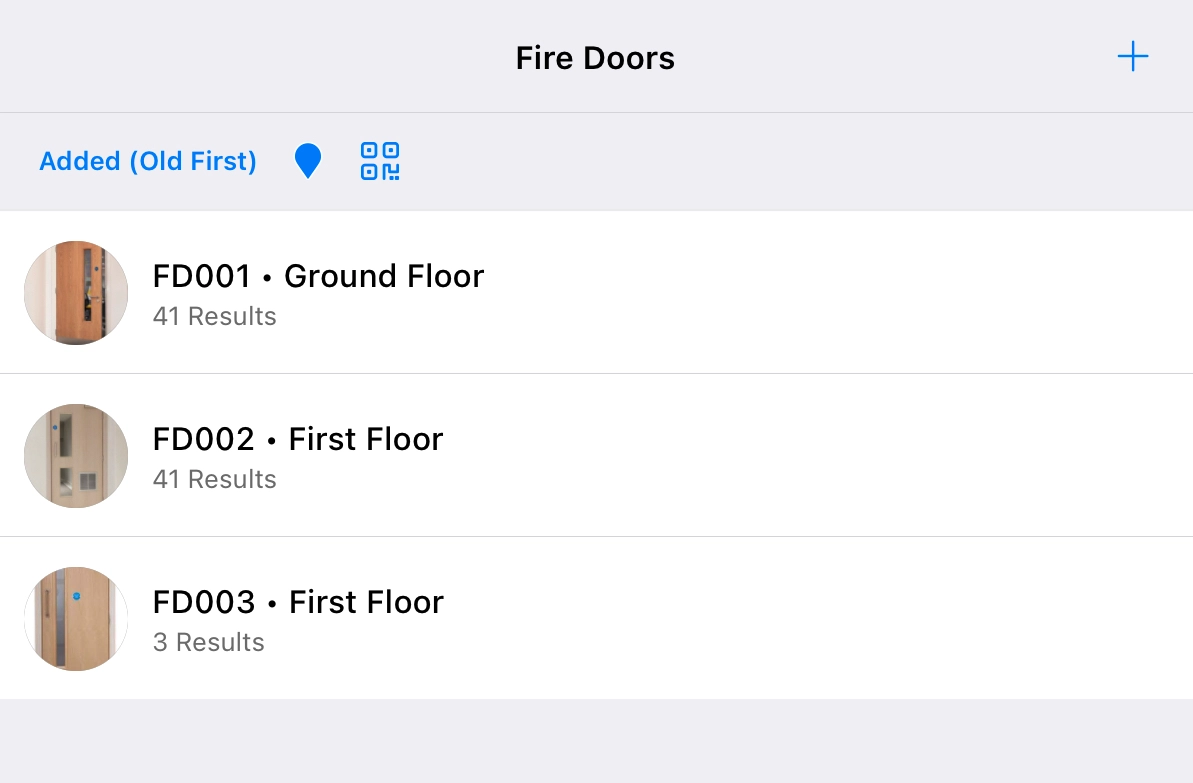
Using the Fire Doors Survey example, everytime you ![]() a door, all the fields in a group are generated and asked of the new door. The findings of repeatable fields can be detailed within the asset information of a report or formatted in it's own section in the case of a door, compartmentation or exterior wall survey.
a door, all the fields in a group are generated and asked of the new door. The findings of repeatable fields can be detailed within the asset information of a report or formatted in it's own section in the case of a door, compartmentation or exterior wall survey.
Create a New Group of Repeatable Fields
- Press Group.
- Give the group a name.
- Check Repeatable.
- Singular Name appears. If the group is called 'Fire Doors', the singular name could be 'Door'. Provide the singular name.
- Press Add - top, right.
Add Fields to the Repeatable Field Group
- Press Add field.
- See Create New Field
Fields In Assessments
Include your fields in your assessments.
Add and update information about your asset alongside answering questions and adding actions and controls. This makes completing risk assessments more efficient because you no longer need to leave the assessment to add static information about an asset.

Field information can now be added/edited during an assessment and gets saved to the asset when the assessment is Approved.
Add Fields To Your Assessment Templates
Learn how to setup fields in assessments.