Get Support
Before contacting us, search the documentation below.
When getting in touch, please describe your issue in detail. Include any errors you see and take a screenshot.
WhatsApp us at
07700 168 194
07700 168 194
How-to
Guides to help you perform your:
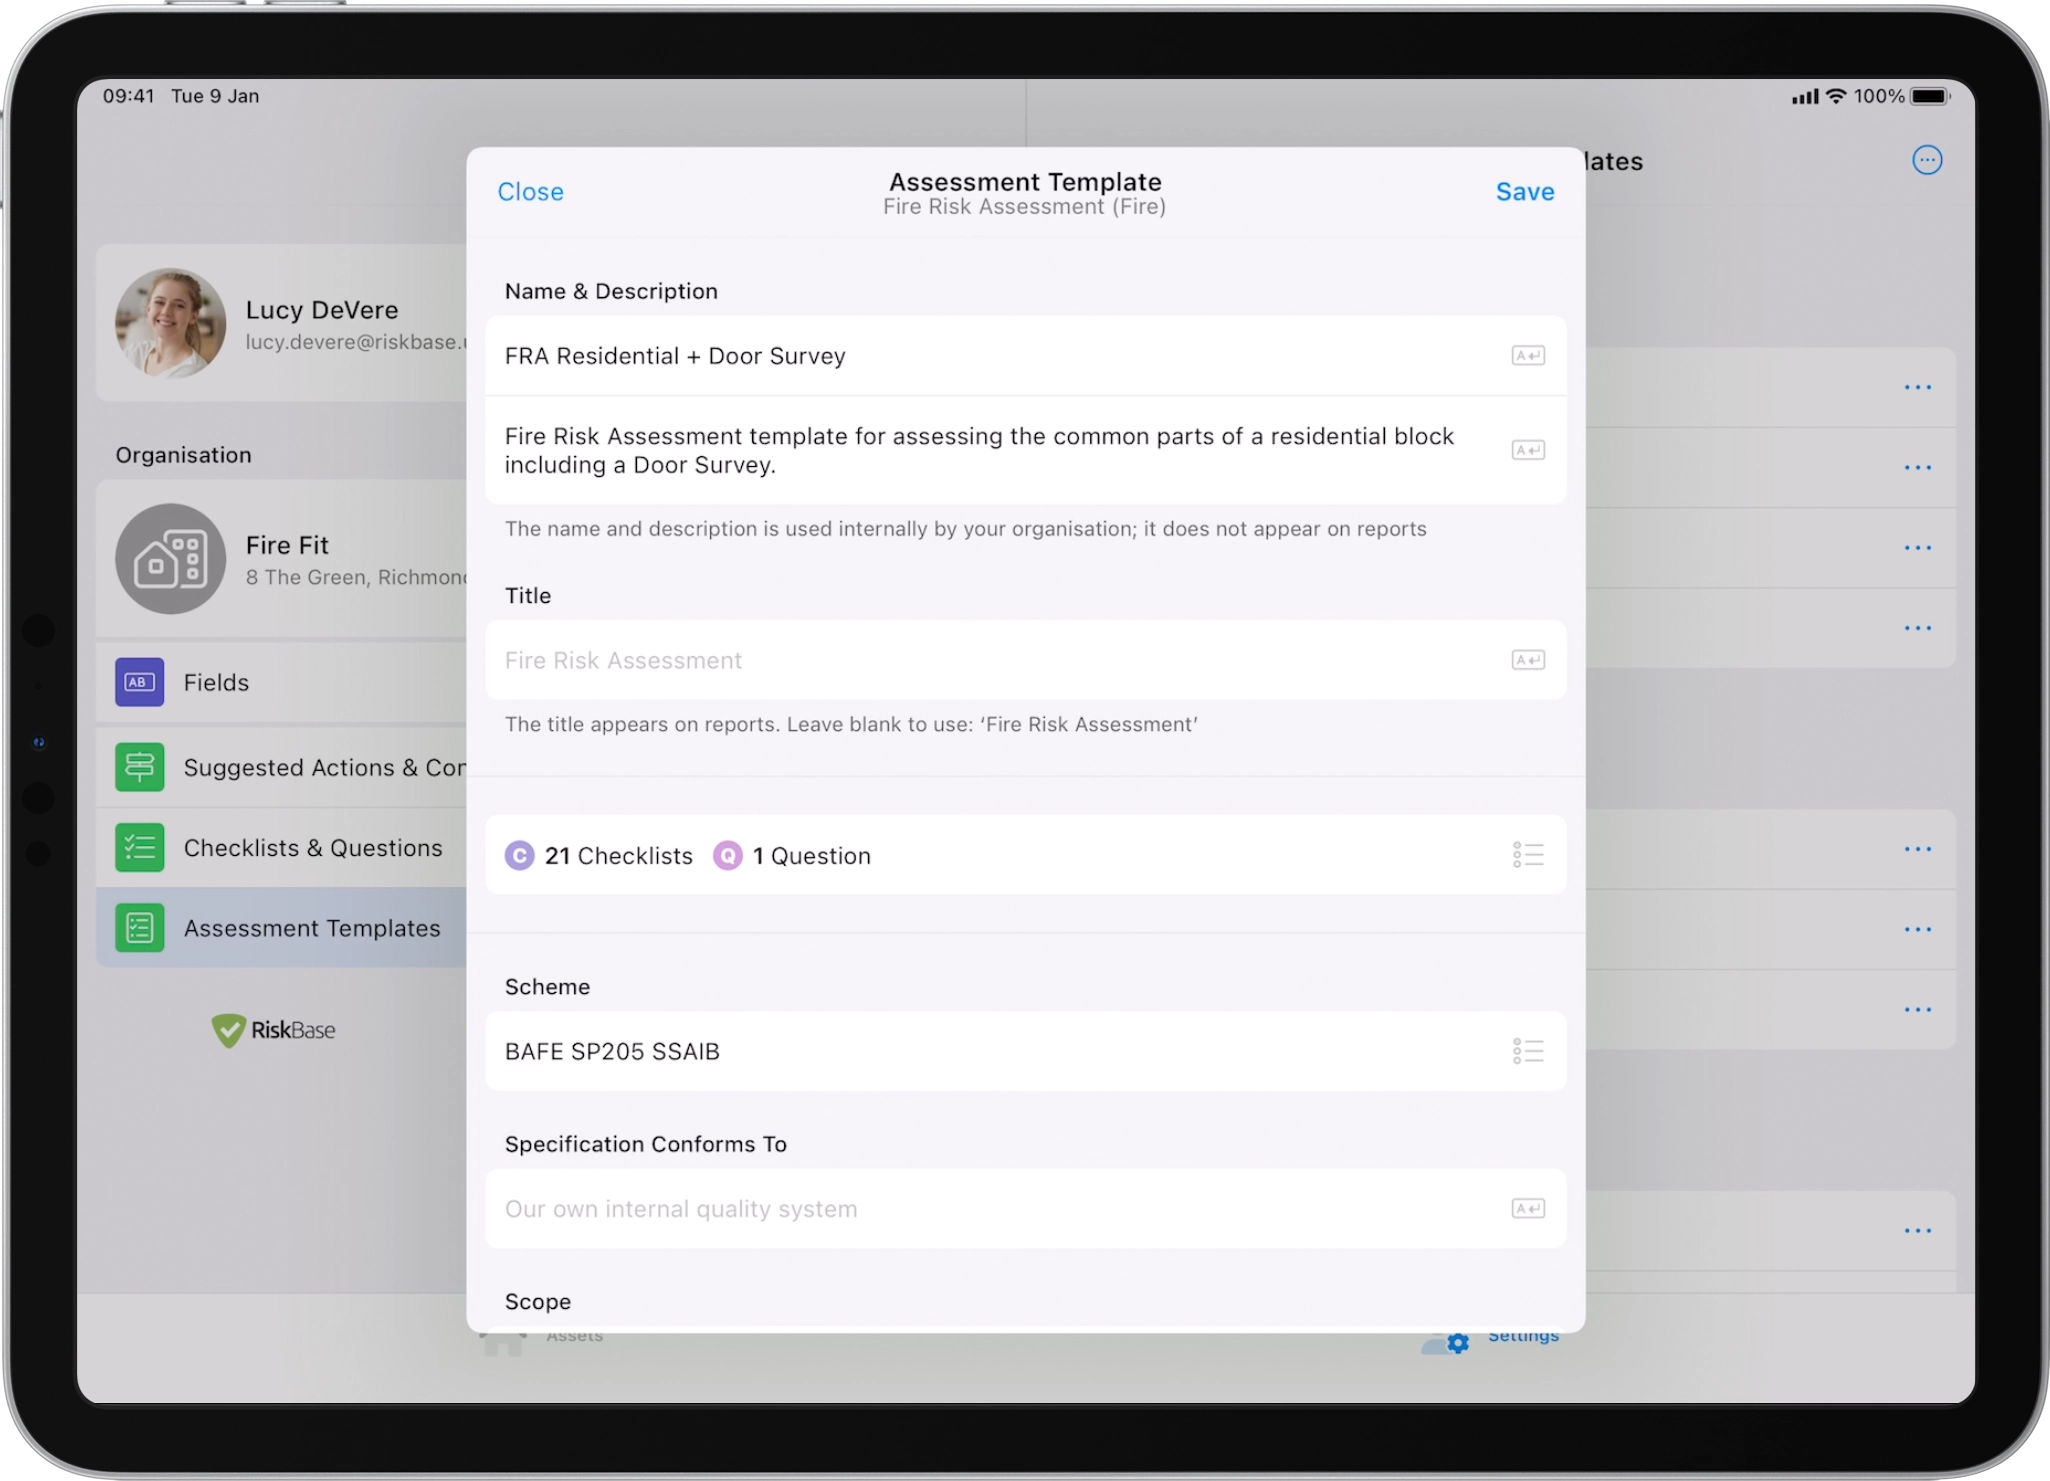
App
Build templates & perform assessments with RiskBase App. Set up fields, timescales & severities. Manage your account & security settings.
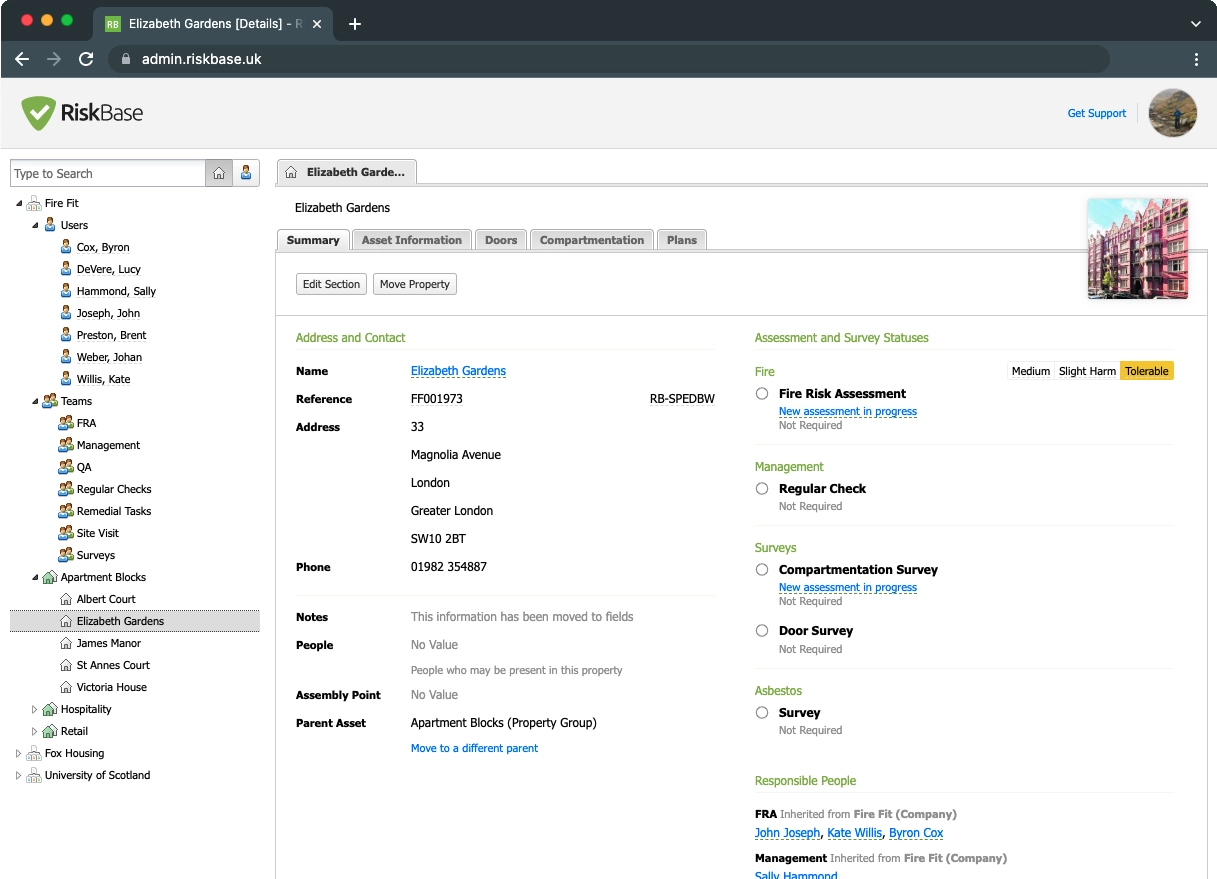
Admin
Admin.RiskBase is for managing tasks, users & assets. Assign, schedule, approve & report on our desktop platform.